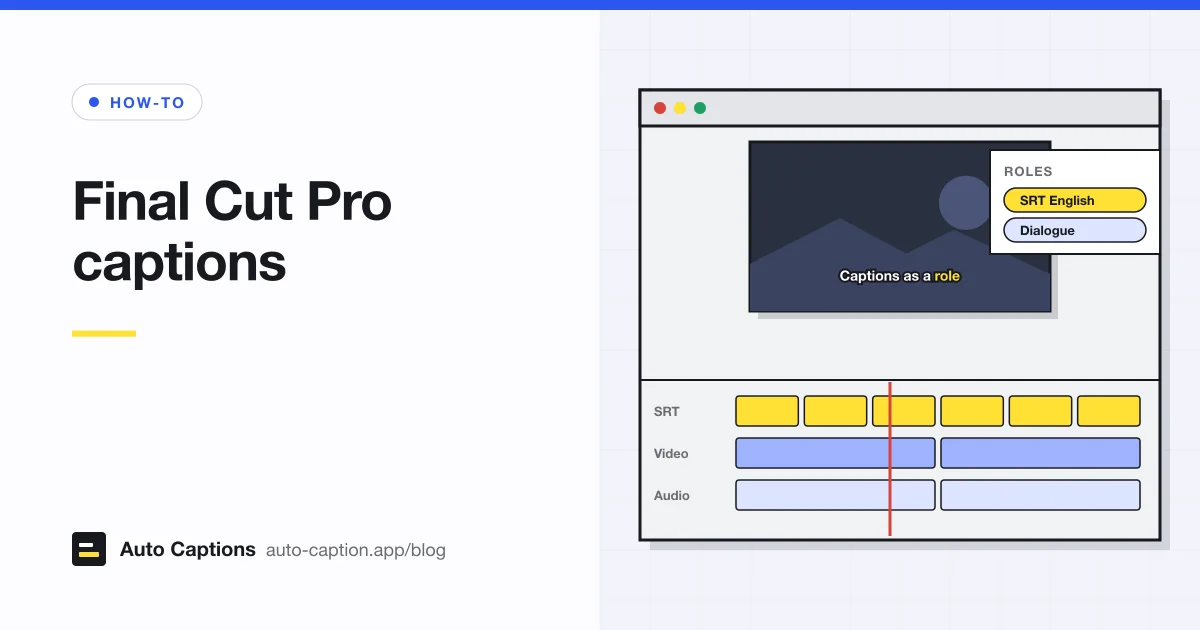
Final Cut Pro treats captions differently from titles. They live on caption roles, in their own lane, and they follow industry formats so they can travel to YouTube, broadcasters and other apps. Since version 12.3, Generate Captions can also make subtitles, which are styled titles that always render into the picture. Knowing which one you're making saves a lot of confusion later.
Everything below follows Apple's Final Cut Pro user guide for Mac, version 12.4, as it read in October 2026. If you're on an older version, some commands have other names. The automatic transcription feature arrived in Final Cut Pro 11.0 in November 2024 as Transcribe to Captions, which required a Mac with Apple silicon and macOS Sequoia, according to Apple's release notes. Version 12.3 (June 2026) added automatic subtitles, and the current guide calls the command Generate Captions.
Caption roles and the three formats
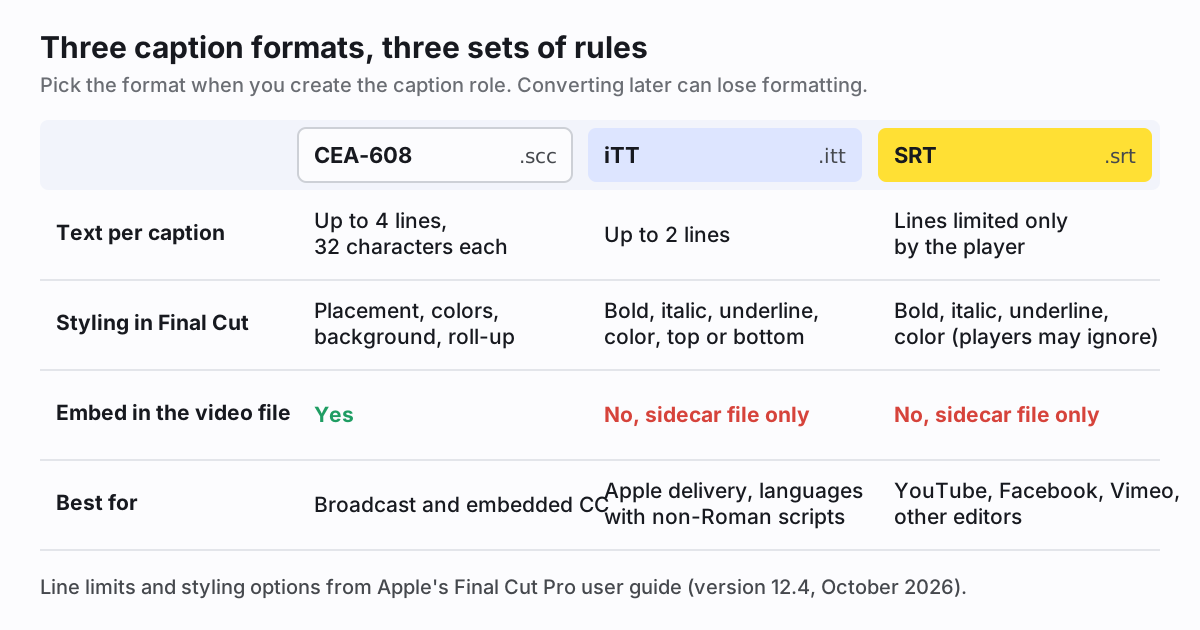
Every closed caption belongs to a caption role, and every role has one format: CEA-608, iTT or SRT. Inside a role, each language is a subrole. So a project with English and Spanish SRT captions has one SRT role with two language subroles, and you switch between them in the timeline index.
To set one up by hand:
- Choose Modify > Edit Roles, then click Captions at the top of the role editor.
- Click the Caption Role button and choose iTT, CEA-608 or SRT. Final Cut adds a language subrole based on your macOS language.
- To add another language, hover over the role, click the Language button and pick one.
- Click Apply. The roles are now available to every project in the library.
Pick the format you'll deliver, not the one that sounds most professional. For YouTube, Vimeo, Facebook and other editors, SRT is the safe choice. iTT handles non-Roman scripts better, and CEA-608 is the one broadcasters ask for.
Transcribe speech with Generate Captions
Select the clips with speech in the timeline, then choose Edit > Generate Captions. The submenu has two options, and they make very different things:
- Closed Captions (Shift-Command-C) creates iTT caption clips in the caption lane, connected to the clips they came from. Viewers can switch them off once you export them as a sidecar file. Apple's closed captions page covers this route.
- Subtitles (Shift-Command-S) creates title clips from the default Subtitle title, with the Subtitles role. They render into the video. In the Title inspector you can pick an Animation Style (None, Fade, Scale, Highlight or Fill), animate by character, word, line or all at once, and tick Vertical Social Media Safe for 9:16 video, as described on the automatic subtitles page.
Both need a Mac with Apple silicon, and both transcribe U.S. English only. The first time, Final Cut downloads the language model, which needs an internet connection once. Apple's own tip is worth following: background music and overlapping voices hurt accuracy, so run Voice Isolation or Noise Removal on the dialogue first.
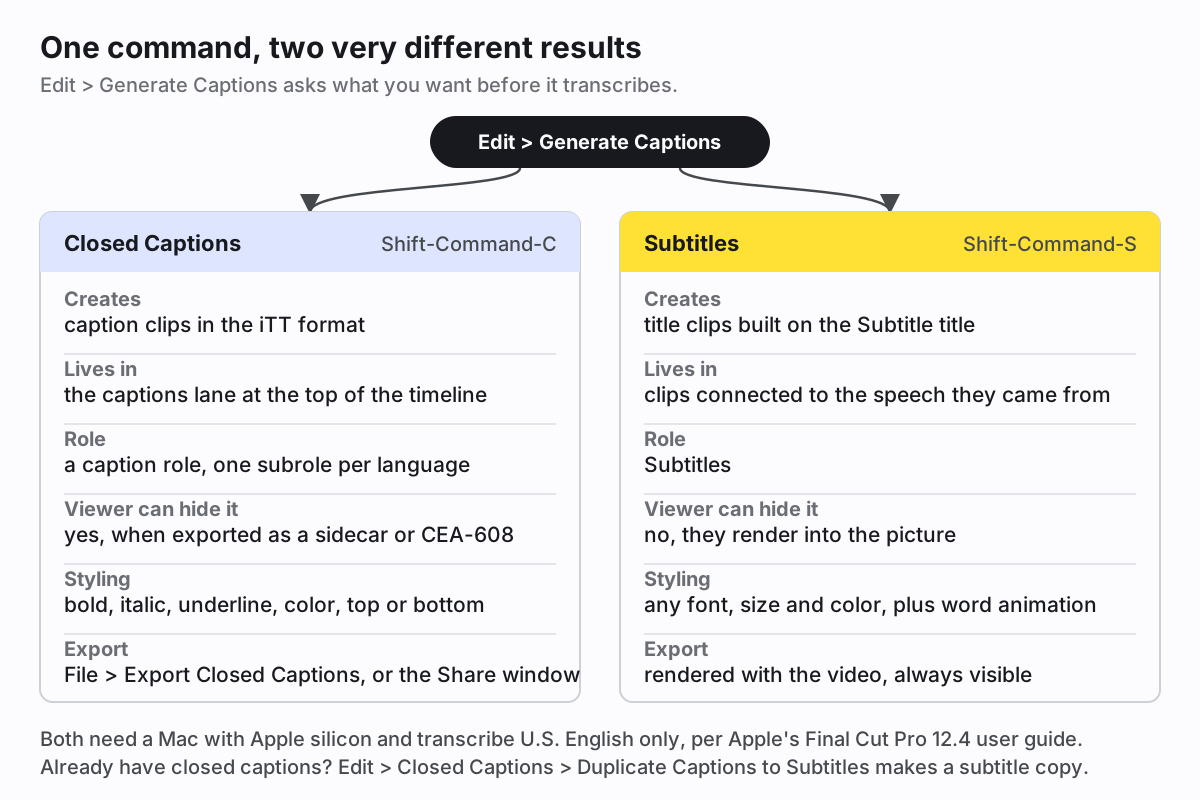
Already made closed captions and now want the styled look? Edit > Closed Captions > Duplicate Captions to Subtitles makes a subtitle copy and keeps the originals.
Import SRT, iTT or CEA-608 caption files
If your video isn't in English, or you already have a transcript, import it. Our SRT generator transcribes more than 50 languages and hands you an SRT to correct first. Then, per Apple's import steps:
- Open the project in the timeline and choose File > Import > Closed Captions.
- Select the file. It must be .srt, .itt or .scc (CEA-608).
- In Import as Role, choose a caption role on the left and a language subrole on the right.
- In Insertion Time, choose Relative to Timeline or Absolute. Relative adds the project's start time to each caption, which is what you want for an SRT that counts from zero. Absolute uses the times as written, for files made against the project's real timecode.
- Click Import. The captions appear in a caption lane at the top of the timeline.
WebVTT isn't on the list, and neither is ASS, so convert those to SRT first. Our overview of subtitle formats explains what changes between them. If a camera or broadcast file already has CEA-608 captions inside it, add the clip to the timeline, select it and choose Edit > Closed Captions > Extract Captions.
Edit captions in the inspector
To add a caption by hand, put the playhead where it should start and choose Edit > Closed Captions > Add Caption (Option-C), then type in the caption editor that opens. To change an existing one, double-click it, or select it and press Control-Shift-C. Command-Right Arrow and Command-Left Arrow jump between captions.
One thing trips people up: while the caption editor is open, J, K, L, I, O and the Space bar type letters instead of controlling playback. Add Control (Control-J plays backward, for example).
Styling is in the inspector (Command-4), and it depends on the format, as Apple's formatting page describes. SRT captions get bold, italic, underline and text color. iTT adds top or bottom placement. CEA-608 has placement, a small palette of text and background colors, and display styles: Pop-On, Paint-On and Roll-Up. Line limits differ too: CEA-608 allows four lines of 32 characters, iTT two lines, and SRT leaves it to the player (Apple's editing page). A caption that breaks its format's rules turns red, with a warning in the inspector.
Captions are connected clips, so they move with the clips they're attached to, and they're deleted when those clips are deleted. Apple recommends locking the edit before you caption. We agree. Captioning a cut that's still changing means fixing timing twice. If you need the same captions in another format, Edit > Closed Captions > Duplicate Captions to New Format keeps the originals. Apple warns that converting can lose text or formatting.
Export captions as a sidecar file or burned in
For a caption file on its own, per Apple's export page:
- Choose File > Export Closed Captions and name the file.
- In Roles, tick the language subroles you want. Each one becomes its own file.
- Set Start Time to Relative to Timeline (times count from the start of the project) or Absolute.
- For SRT, leave Include Formatting unticked unless you know the player handles it. Apple recommends removing formatting in most cases.
- Click Export.
To handle captions while exporting the video, choose File > Share and a destination, then click Roles at the top of the Share window. From there you can tick caption formats to write as separate files, or click the blue Captions button on a video track and choose a language under Embed CEA-608 or Burn in captions. Apple's Apple devices destination page shows the full pane.
Which to choose: a clean video plus an SRT for YouTube and Vimeo, burned-in captions (or Generate Captions subtitles) for Instagram, TikTok and LinkedIn, and an embedded or sidecar CEA-608 file when a broadcaster's spec asks for it.
When another tool is quicker
If you edit in Final Cut, caption in Final Cut. The captions stay attached to your edit, and the format options go well beyond what a browser tool offers. Other editors do it differently: our guides to subtitles in DaVinci Resolve and captions in Premiere Pro cover those, and the guide to subtitles in iMovie covers Apple's free editor, which does far less.
For a finished clip in a language Generate Captions doesn't cover, or on a Mac without Apple silicon, our tool to burn subtitles into a video is quicker. Load the video and an SRT (or let it transcribe), pick a style, and download the video with the captions drawn in. It runs in the browser, only a compressed audio track is sent for transcription, and there's no watermark. What it can't do is keep the captions tied to an edit that's still changing. That part is Final Cut's job.